Configuring AWS Greengrass Core on VMware vSphere
AWS Greengrass Core on VMware vSphere (Part 2):
In my previous blog, I created AWS Greengrass Core Virtual Machine on VMware vSphere. Furthermore, let’s see how to integrate it with AWS IoT services.
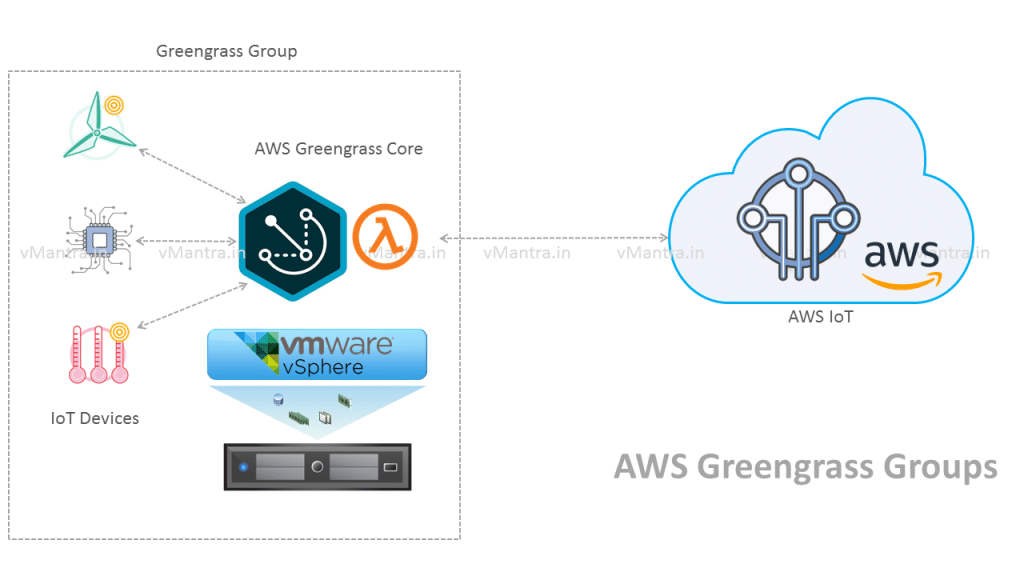
To configure AWS Greengrass Core instances, first create AWS Greengrass Groups definitions in the cloud. Greengrass API does the Creation as well as modification of groups. AWS Cloud stores these Group definitions.
AWS Greengrass Group definition contains all the information about AWS Greengrass group that is required for Greengrass deployment. it consists of all the pieces of information about cores and other devices which communicate with each other. It also has the learning of how messages are processed in the Group.
Configure AWS Greengrass on AWS IoT
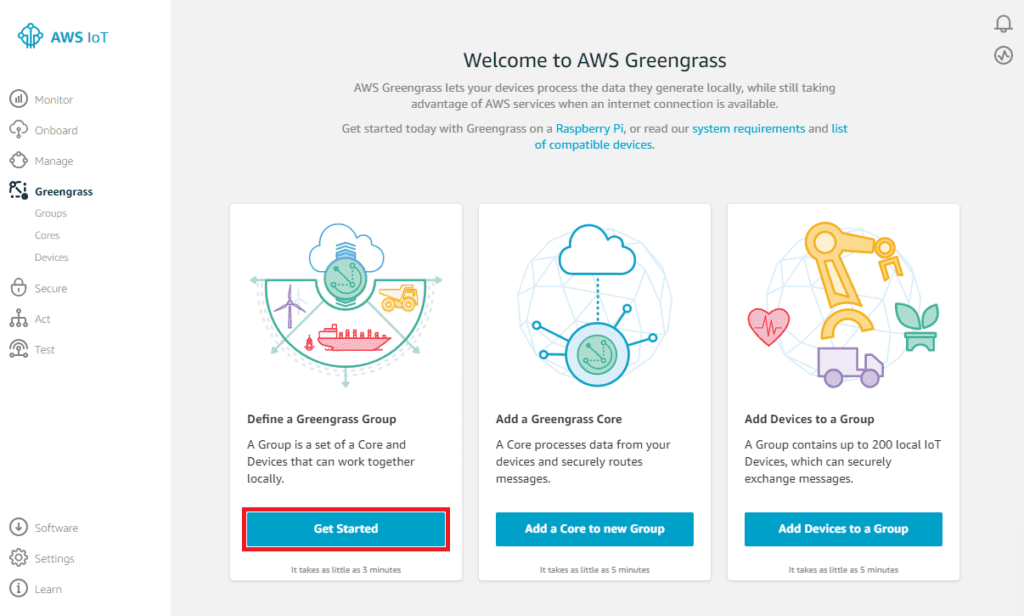
1. Log in to the AWS Management Console and open the Greengrass console under the Internet of Things.
2. On the Welcome to AWS Greengrass page, under Define a Greengrass Group, click on Get Started
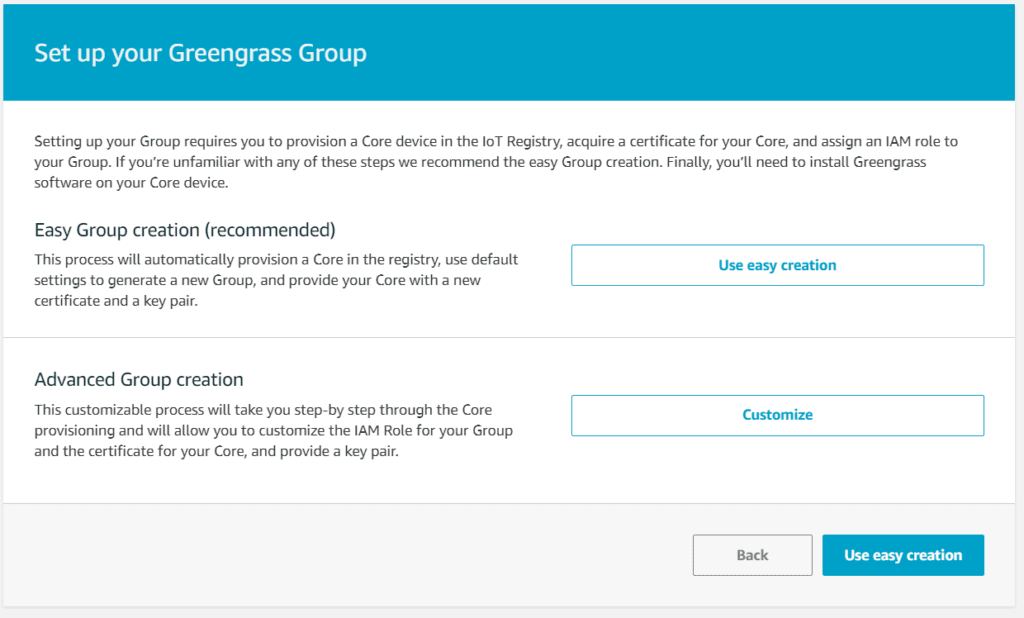
3. Set up your Greengrass Group page has two options Easy Group Creation and Advanced Group creation, choose the first one as it is recommended by AWS.
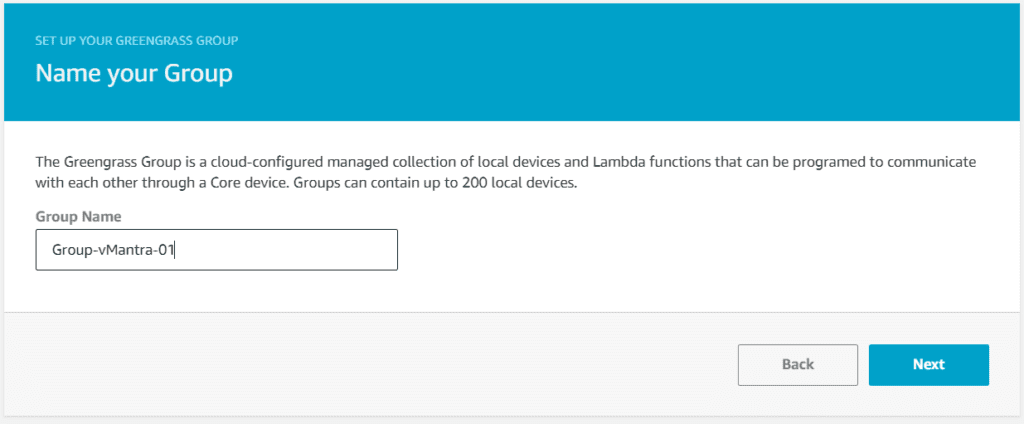
4. At Name your Group page, Enter the name for your group (for example, Group-vMantra-01), then choose Next:
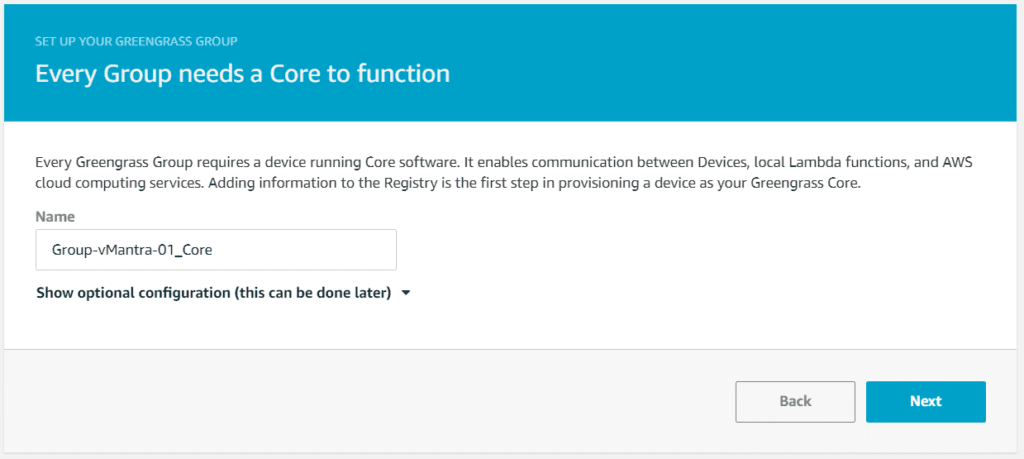
5. On the next page, AWS Greengrass core name should be entered, Use the default name here, and click Next:
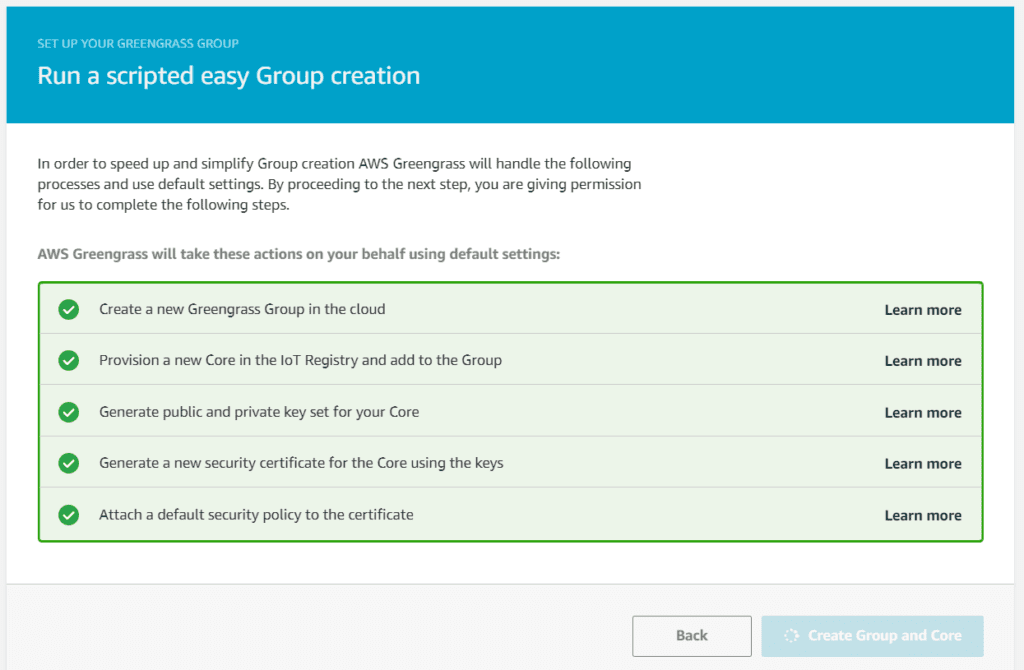
6. Run the deployment script by clicking on Create Group and Core on the Run a scripted easy Group creation page
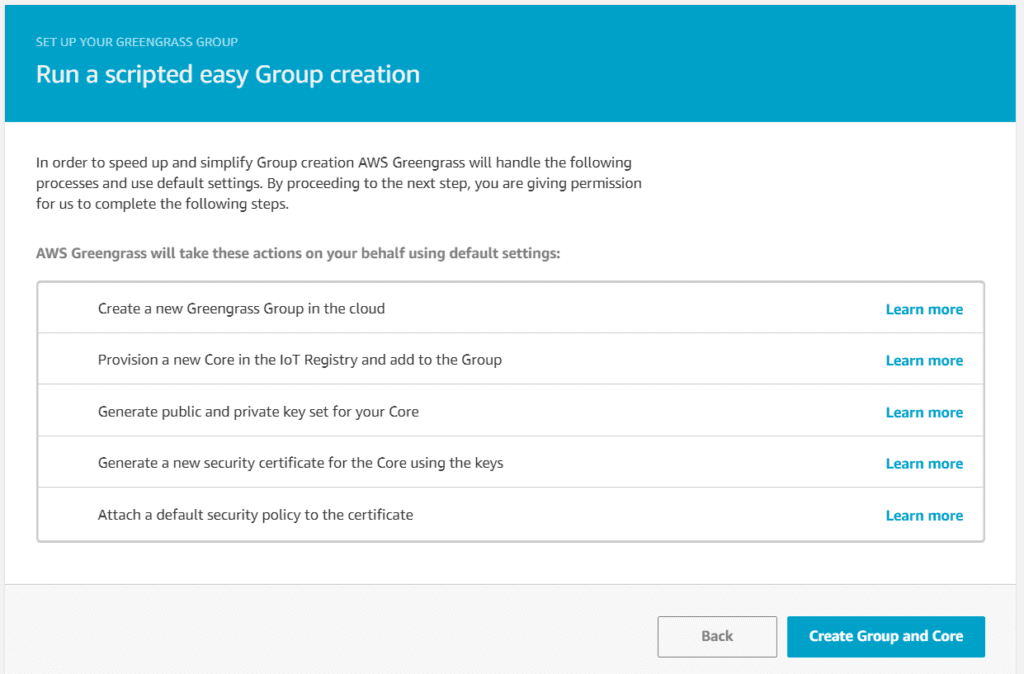
Henceforth, AWS IoT will start creating an AWS Greengrass group with default security policies and configuration files to load onto the devices. You can see the script progress on the same page.
7. When it finished, you will see the security resources and different version of AWS Greengrass Core software for a different kind of CPU architecture. Download the software according to your hardware.
Choose Download these resources as a tar.gz to download the Core’s security resources for your AWS Greengrass core.
Download the current Greengrass Core software gives you options to choose software according to your CPU architecture and operating system.
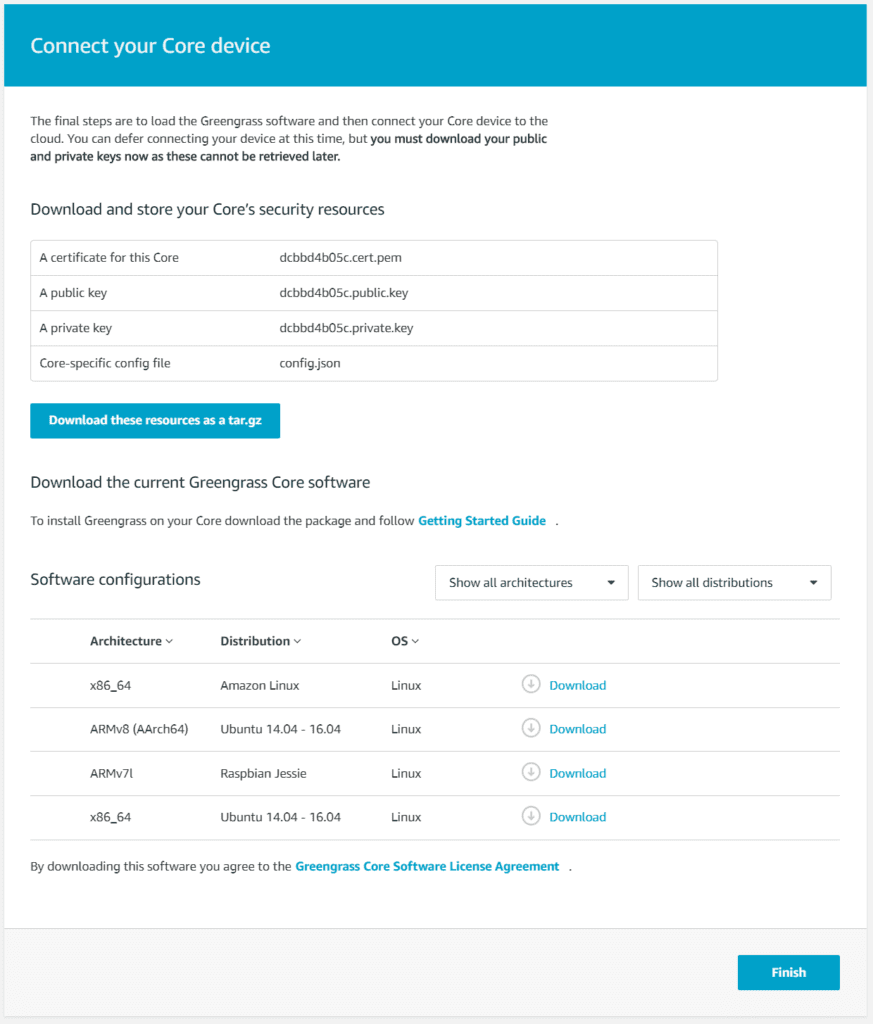
As we deployed AWS Greengrass for VMware vSphere appliance, we do not require to download core software as it already includes AWS Greengrass core software.
However, If you’re using a Raspberry Pi, choose ARMv7l Raspbian Jessie, if using Amazon EC2 instance, choose x86_64 Amazon Linux, and in case of x86_64 Server choose Ubuntu 14.04 – 16.04.
8. After downloading the security resources and AWS Greengrass Core software, choose Finish. Check the new group at Groups under Greengrass.
Configuring AWS Greengrass on the Core Device
In the above steps we have just downloaded two files from the AWS Greengrass console:
a. greengrass-ubuntu-x86-64-x.x.x.tar.gz – this is AWS Greengrass core software that runs on the AWS Greengrass core device. (As communicated before, this file is not required if we are deploying AWS Greengrass for VMware vSPhere appliance, However, if you are going to deploy Greengrass on Raspberry Pi or another platform then it needs to be downloaded).
b. <GUID>-setup.tar.gz – contains security certificates to enable secure communications with the AWS IoT cloud and config.json which contains configuration information specific to your AWS Greengrass core and the AWS IoT endpoint.
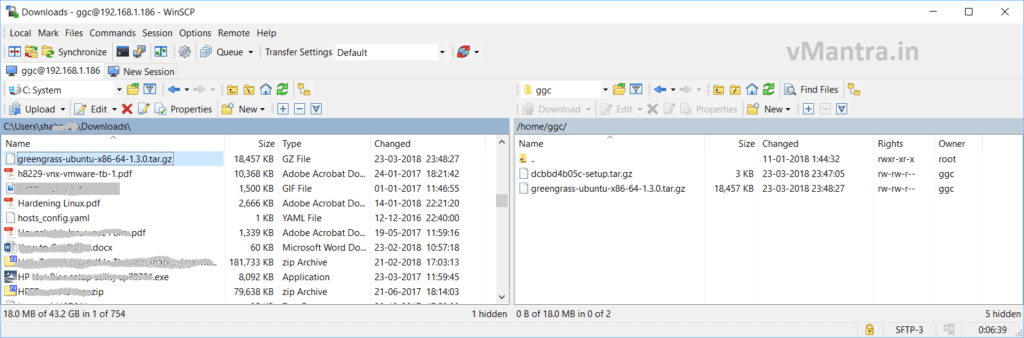
9. Copy downloaded compressed files from my computer to AWS Greengrass on VMware vSphere appliance. I used WinSCP to copy compressed files, there are many ways of file transfer, you can use either.
10. SSH to AWS Greengrass core VM and navigate to the folder where you pasted the compressed files in step 9.
cd path-to-compressed-files11. Next, decompress the files using commands given below:
Note: Deployment other than AWS Greengrass on VMware vSphere Appliance also require to decompress AWS Greengrass core software as well using below command:

 sudo tar -xvf greengrass-ubuntu-x86-64-x.x.x.tar.gz -C /
sudo tar xf xxxx-setup.tar.gz -C /greengrass
This command copies the certificates into the/greengrass/certs folder and the config.json file into the /greengrass/config folder (via the -C /greengrass argument).
12. Check if the certificates have been properly installed.
ls /greengrass/certs
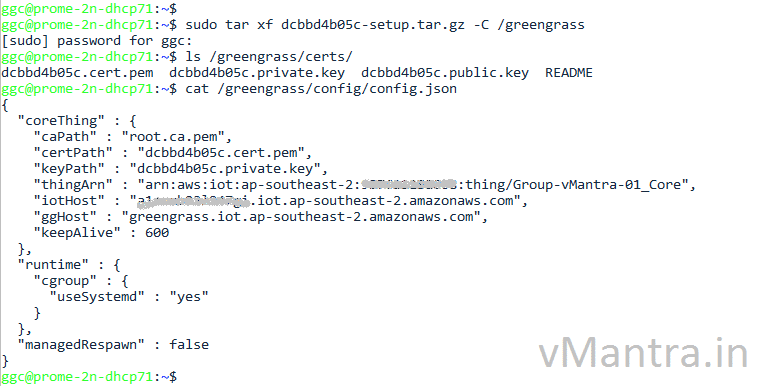
13. Verify the config.json file:
cat /greengrass/config/config.json
14. AWS Greengrass on VMware vSphere appliance requires a root CA certificate to communicate with AWS IoT using the MQTT messaging protocol over TLS. For this purpose, we need to install the Symantec VeriSign root CA.
cd /greengrass/certs/

sudo wget -O root.ca.pem http://www.symantec.com/content/en/us/enterprise/verisign/roots/VeriSign-Class%203-Public-Primary-Certification-Authority-G5.pem

15. Finally, run the following commands to start AWS Greengrass
sudo /greengrass/ggc/core/greengrassd start
16. You should see output similar to the following (note the PID number):
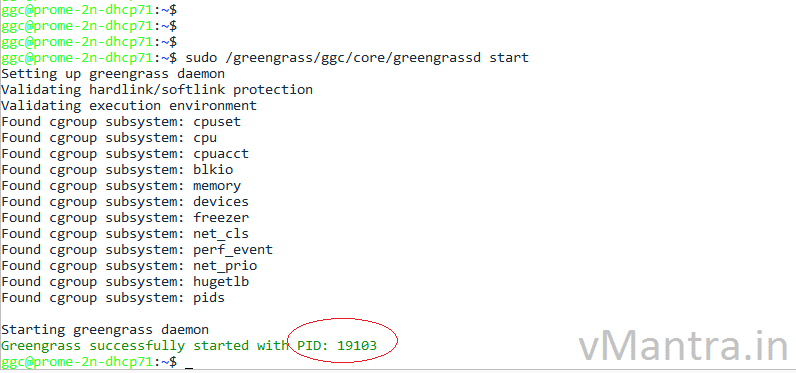
17. At the same time, run the below command to make sure if AWS Greengrass core daemon is functioning. Replace PID-number with your own PID number:
ps aux | grep PID-number
Next Step
As shown above, AWS Greengrass Core is ready now. Next, we need to learn about AWS Lambda Functions and deploying it on AWS Greengrass Core device.
Thanks!!
Check out some more blogs:
- Deploying AWS Greengrass on VMware vSphere
- VNF Manager vs NFV Orchestrator (VNFM vs NFVO)
- Network Functions Virtualization (NFV)
- What is Hyper-Threading?
- Installing VMware Workstation on Windows
- Virtual Networking in VMware Workstation
If you like my blogs Please Share…