Install Windows Server 2016 VM on VMware Workstation
Install Windows Server 2016 VM on VMware Workstation :
In the previous post I have described the step by step procedure of Creating Windows Server 2016 VM. so now its turn to install Windows server 2016 on VM.
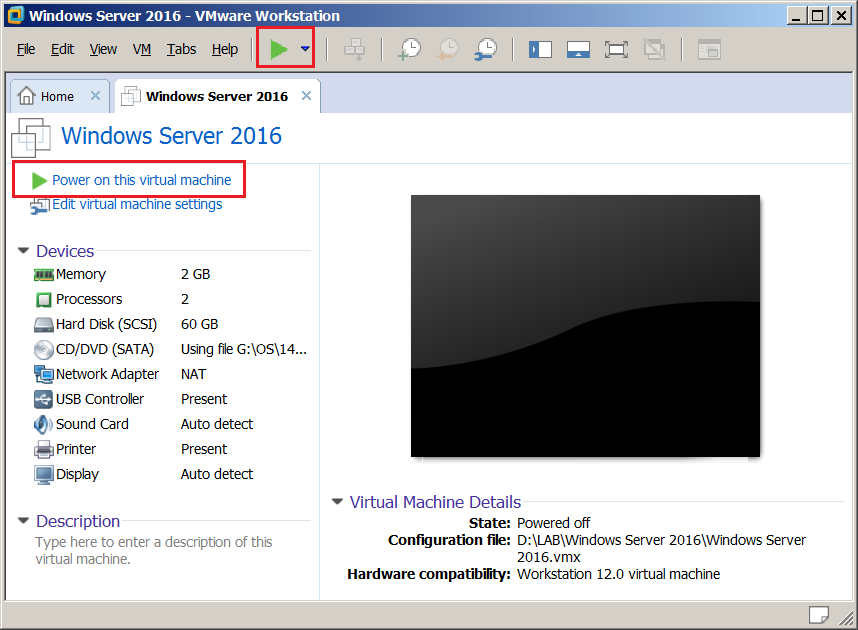
First of all open the VMware Workstation and select Windows Server 2016 virtual machine. Click on the Power on this virtual machine and VM will start on the right side of window. Please wait till its boot up completely.
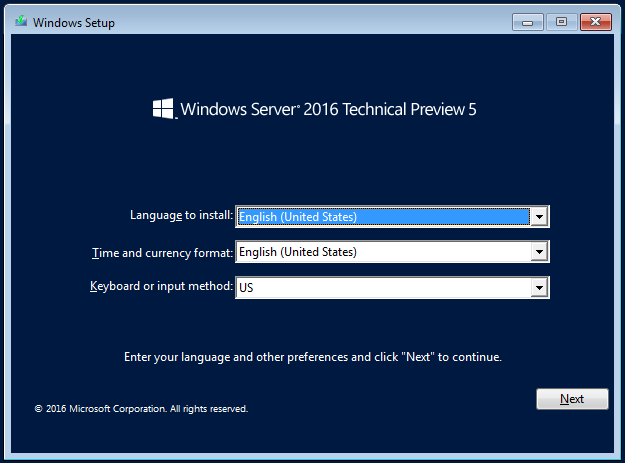
- After booting the VM, on the first page where you can specify Language, Time Zone and the Keyboard.
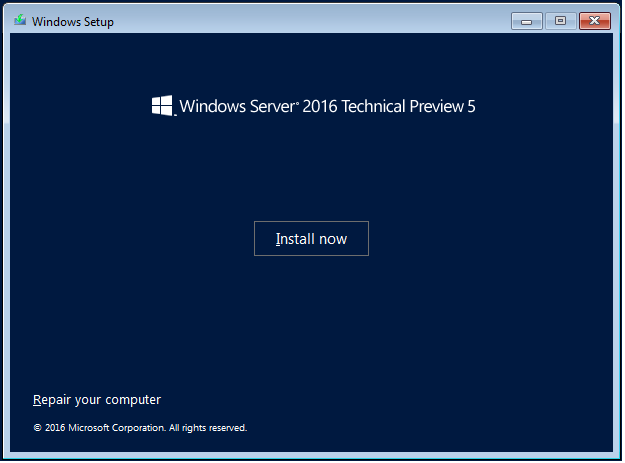
- Click Install now to start the installation.
- Activate the Windows by entering the Product Key and click on Next
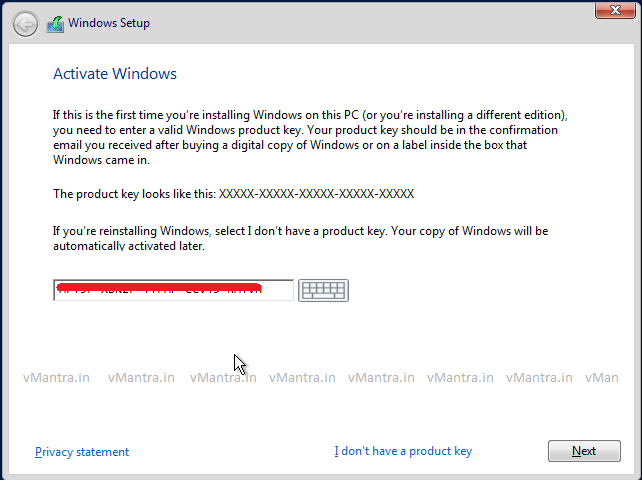
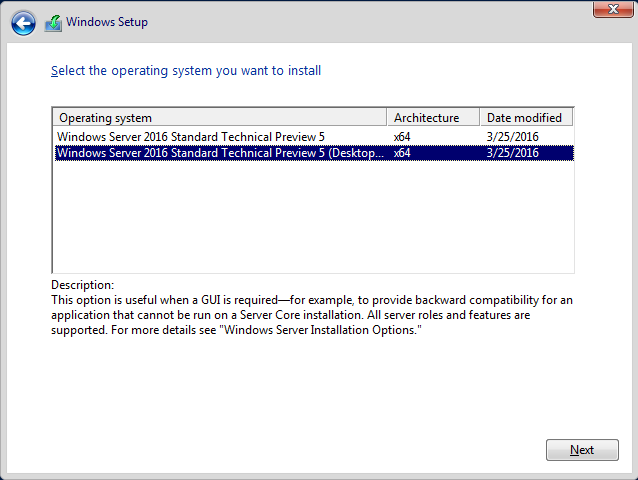
- On the next window select Windows Server 2016 Technical Preview 5 (Desktop Experience) to install GUI then click on Next
- Accept the license terms by check the checkbox next to I accept the license terms, then click on the Next button.
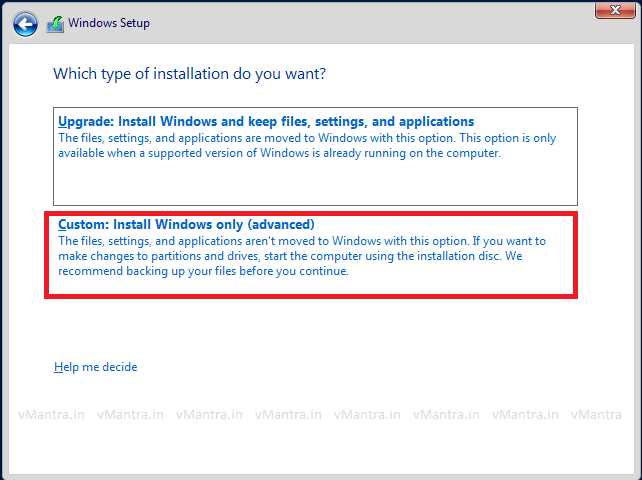
- Click on the Custom: Install Windows only (Advanced) option to install a fresh OS, furthermore you can also upgrade existing installed Windows server by selecting another (Upgrade) option.
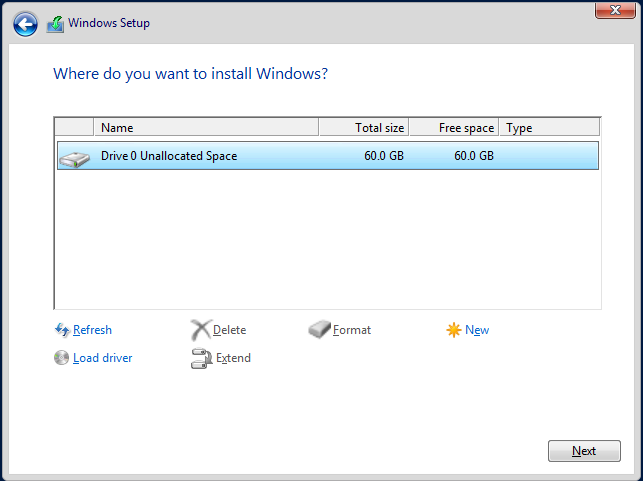
- Select the disk and click Next to install the windows, it will automatically create the required partitions using whole virtual disk, However if you want to create partition table manually then select the disk, click on New and create desired partitions.
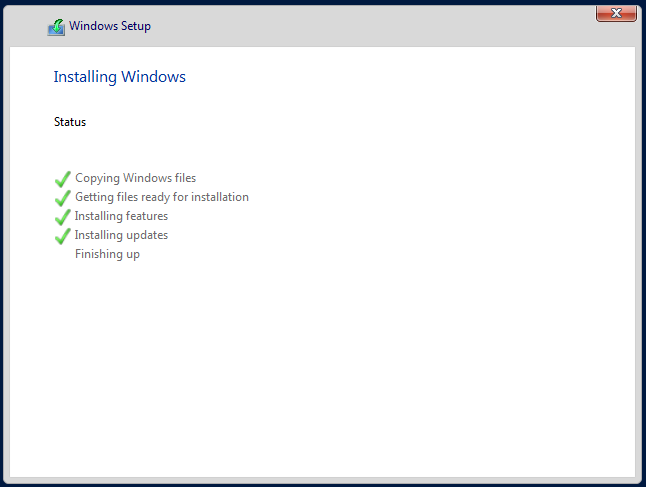
- Windows will now start the installation process including Copies all the files to the disk, Install features and updates. Windows will finally reboot when installation will be completed.
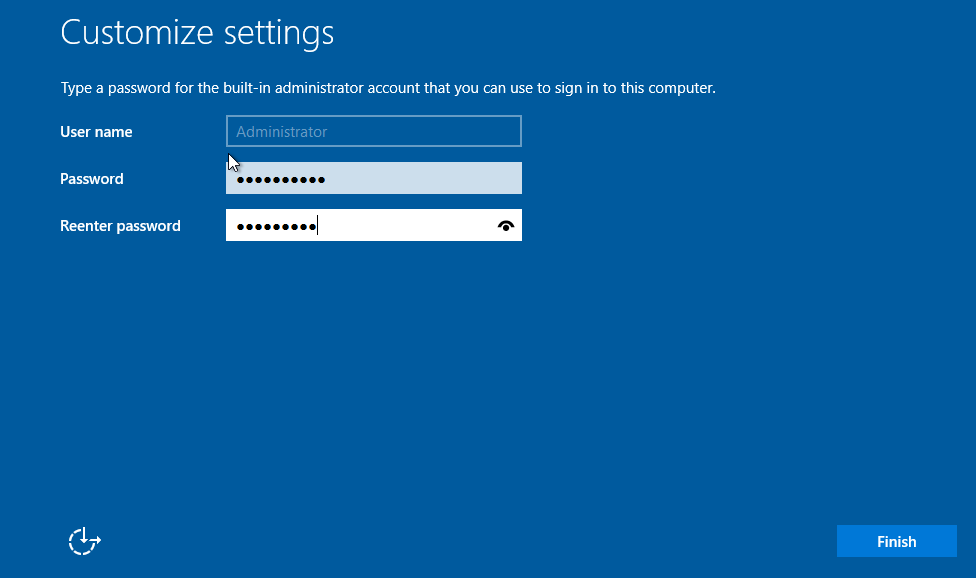
- After reboot assign the password and click Finish button.
Window server 2016 is installed now and you can enjoy it’s features. You can find the step by step procedures like How to promoting Windows server 2016 to Domain Controller, deploying the DNS server etc. in my next blog.
Note:
Please do not forget to install VM tools after installing the Windows Server.
Enjoy 🙂

